[M3L1] Prototyping
Your goal for the hackathon
Build a prototype of a web app and present it on the last day.
When you arrive on the first day of the Hands:On Hackathon we will introduce this simple brief. During the course of the week you will pick a manuscript, form a team and create a digital experience that explores some aspect of your manuscript for a specific audience.
There are two terms in this brief that you might not be familiar with: ‘prototype’ and ‘web app’. We have used the term ‘web app’ rather than ‘website’ because the latter term can imply information presented statically on a page, whereas we want you to be inspired to create something interactive and dynamic that will capture the imagination. I will explain about the term ‘prototype’ in the next section.
Further reading (optional):
Key Differences Between Website and Web App (up to, but not including, the section entitled ‘Combining Websites and Applications’): https://modeeffect.com/key-differences-between-website-web-app/
Prototyping to explore ideas
A prototype is a draft version of a product that allows you to explore your ideas and show the intention behind a feature or the overall design before investing time and money in full development. Prototypes can be shown to users at an early stage and throughout the design process to get feedback and improve your design, thus avoiding costly mistakes.
A prototype can be anything from paper sketches (quicker to make, low-fidelity) to a fully functioning model (slower to make, high-fidelity). By ‘fidelity’, I mean, how accurately the prototype resembles a finished, polished product the end user will experience. The different types of prototypes have different uses and benefits during the design process, and a prototype does not have to be high-fidelity to be shown to users. In fact, sometimes the high level of detail in a high-fidelity prototype can be distracting and lead to feedback that is less useful, particularly early on in the process (‘I don’t like that font’, or ‘the colour you’ve used on your buttons is ugly’ etc.). Any final product — for example, a website or a car — may have been developed from hundreds or thousands of sketches but probably only a few high-fidelity models.

During the course of the Hackathon we expect you will make use of many sketches and paper prototypes, and we hope that you will create a high-fidelity model web app to show for your efforts at the end, though we don’t expect it to be fully functional by any means. It is a prototype of a web app.
More about low-fidelity techniques
After forming your team, we recommend you start with low-fidelity prototyping to generate, test and discuss multiple ideas. This helps you to focus on your ideas rather than get stuck in the details of how you will make the app and exactly what it should look like. It also ensures that you will have something to present every day at meetings to communicate your ideas and elicit early feedback. With low-fidelity prototypes, people will better understand that you are thinking about general purpose and function, and give feedback accordingly. Once your have picked an idea you can iterate on it with low-fidelity techniques too, to revisit and refine your idea.
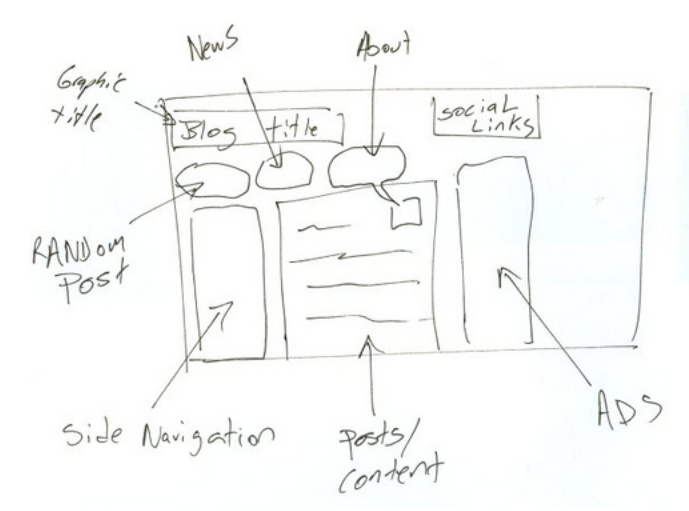
Sketching
Sketching is rapid, free-hand drawing to visualise alternative designs. Sketching helps when you need to generate lots of ideas and to discuss them. Since sketches are disposable you can feel confident to discard ideas and suggest changes without worrying you have wasted your time (and without feeling hurt or causing offense!).
Paper prototypes
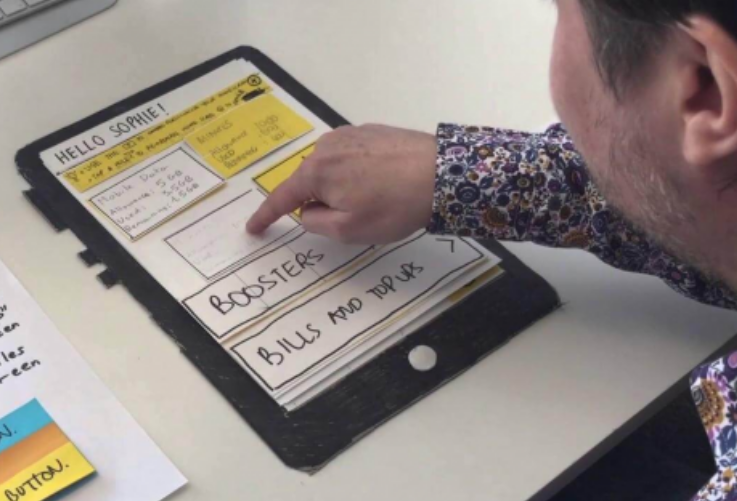
Paper prototyping is creating a version of your web app without using software, using pieces of paper, Post-It notes and stickers to stand in for text, buttons, actions and screens. It is easy to swap bits around so paper prototypes are good to explore different ideas and refine designs quickly.
In the example below, the designer has made a paper prototype of a coffee ordering tablet app:

Paper prototypes are great for getting early feedback from testers — for example, a user can press the ‘buttons’ and members of the team can move the prototype pieces around to simulate interactions. Notes can be written directly on a paper prototype for future reference.
In the example below, a user tests the prototype by interacting with it as if it were real (source: https://theblog.adobe.com/prototyping-difference-low-fidelity-high-fidelity-prototypes-use/)
You can even take videos of the prototype in action. Here are some examples of video walkthroughs of prototypes:
Breaking free with rapid prototyping for creativity
‘Rapid prototyping’ is a concept that originates in manufacturing, whereby the designs of physical objects can be tested quickly and cheaply by making models of them using new techniques such as 3D printing. In a digital humanities context, you might have come across 3D-printed objects made from digital models of museum artefacts. This technique originated with rapid prototyping in manufacturing!
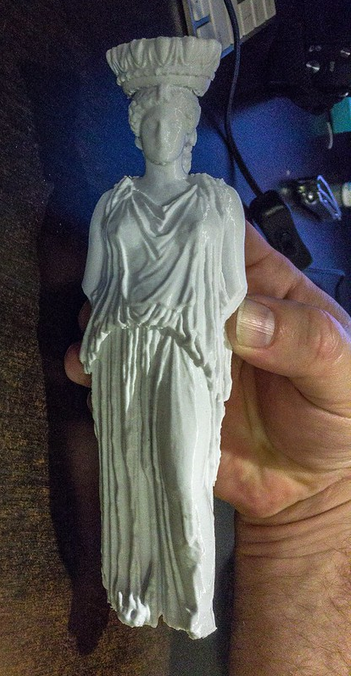
(source: https://www.flickr.com/photos/jerry7171/41302933912)
Further reading (optional):
British Museum 3D models: https://sketchfab.com/britishmuseum/models
3D printing artifacts from the Penn Museum: https://ultimaker.com/learn/3d-printing-artifacts-from-the-penn-museum
Rapid prototyping is also applied in the software world to describe ‘manufacturing’ digital objects to test and refine their design. But I use the term here rather loosely to mean simply ‘creating prototypes quickly’ and I will discuss the testing and refining of prototypes in the next section Design thinking.
What I want to explore now is how making many things quickly can help with creativity. In the academic humanities, we privilege the deep dive and long view of a topic. We want research to be careful and thorough, as it should be, and we tend not to ‘build’ anything (articles, monographs, databases, etc.) until we are relatively far along with the process of research. But it can be difficult to break free from the tyranny of perfectionism, the fear of failure and the anxiety of making mistakes. Perfectionism, fear and anxiety are the enemies of creativity! Hackathons are great for stepping outside of the typical academic context, but how can we persuade ourselves to let go?
A story of overcoming the tyranny of perfection is given in a book about the process of making art:
The ceramics teacher announced on opening day that he was dividing the class into two groups. All those on the left side of the studio, he said, would be graded solely on the quantity of work they produced, all those on the right solely on its quality. His procedure was simple: on the final day of class he would bring in his bathroom scales and weigh the work of the “quantity” group: fifty pound of pots rated an “A”, forty pounds a “B”, and so on. Those being graded on “quality”, however, needed to produce only one pot — albeit a perfect one — to get an “A”. Well, came grading time and a curious fact emerged: the works of highest quality were all produced by the group being graded for quantity. It seems that while the “quantity” group was busily churning out piles of work – and learning from their mistakes — the “quality” group had sat theorizing about perfection, and in the end had little more to show for their efforts than grandiose theories and a pile of dead clay.
Bayles, D. & Orland, T. 2001. Art & Fear: Observations On the Perils (and Rewards) of Artmaking, Image Continuum Press, p. 29.
This example is commonly cited by those practicing in user-centered design and human-computer interaction as support for the idea of high quantity as a method for generating creative ideas. An effective design process is marked by starting with many ideas. We can think of a prototype as the creation of an idea rendered as an artefact — any physical form can qualify — and so rapid prototyping is creating lots of prototypes quickly.
Exercise 1: Star Person on Holiday
One thing that people sometimes worry about when making sketches or paper prototypes is the quality of their drawing. The thoughts ‘I can’t draw’ or ‘my drawing is terrible’ might enter your mind as you think about creating prototypes. This kind of negative self-talk is destructive to your creativity and will hinder your ability to allow your thoughts to flow. If you find yourself experiencing negative self-talk, choose an alternative, positive phrase to replace it with, for example, ‘I can draw’ or ‘my drawing is good enough’.
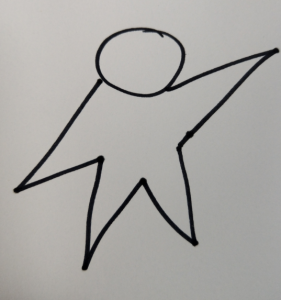
In fact, the artistic quality of your drawing is not relevant to sketching ideas or creating prototypes. For this exercise we will be drawing ‘star people’, a concept popularised by Bill Verplank, a pioneer of interaction design. A star person is simply a head and four limbs represented by the points of a star — although you can use stick figures if you prefer. This crude figure is sufficient to convey almost any behaviour in any situation, and the intention is to focus on what the star person is doing, not on what they look like.
Gather a small stack of A4 paper and a thick marker of a single colour. A Sharpie, or other similar pen, is ideal since the lines are thick and will prevent you from getting distracted by detail. Set a timer for 5 minutes (e.g. on your phone).
When you start the timer you will have 5 minutes to draw as many holiday scenes with ‘Alex’ the star person as you can. Split each piece of paper into 6 sections and draw a scene in each. Imagine all the places around the world where Alex could visit or what they could do to relax and enjoy themselves. Imagine what you might like to do on holiday. Include only enough detail as to render each idea, no more. Use as many pieces of paper as you can in 5 minutes.
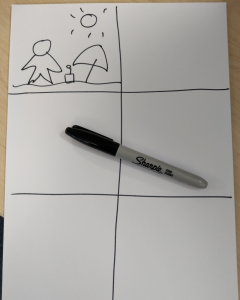
After you have finished, take a picture of all your pieces of paper. How many scenes did you manage in five minutes? There will be a prize for the participant with the most scenes!
Now you are ready to Go to the Next Lesson >