[M3L2] Design Thinking
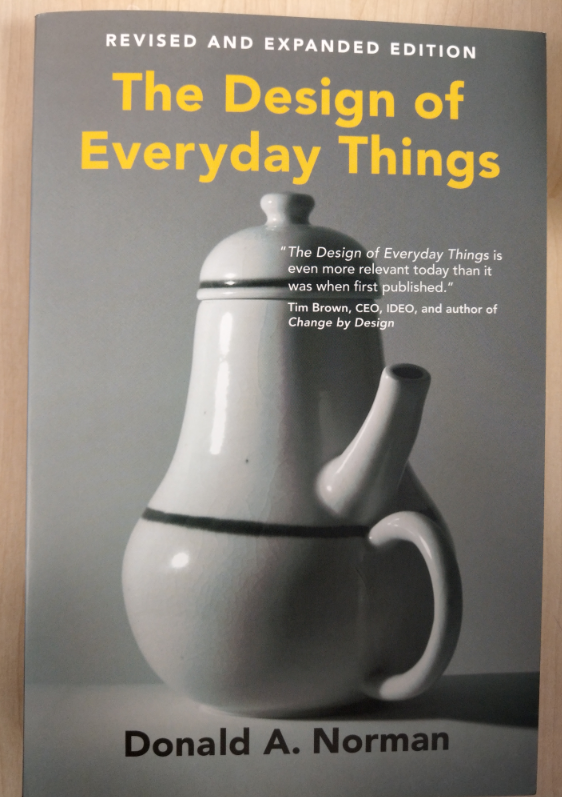
One of the most influential books in technology design over the last thirty years is The Design of Everyday Things by usability expert Donald Norman. This best-selling tome popularised the practice of ‘human-centered design’ through ‘design thinking’, which is the philosophy behind our approach for the Hackathon. (I will usually refer to ‘user-centred design’ as being synonymous with this, although there are some subtle differences.) While you may think of kettles, doors, taps or light switches as being typical everyday things, in fact, Norman discusses a large array of technology you may encounter regularly in your environment, and these days this very much includes websites and web apps, like the ones you will be making at the Hackathon.
Norman summarises:
Human-centered design (HCD) is the process of ensuring that people’s needs are met, that the resulting product is understandable and usable, that it accomplishes the desired tasks, and that the experience of use is positive and enjoyable.
Norman, D.A. 2013. The Design of Everyday Things, revised & expanded edition, London: MIT Press, p.219.
Consider for a moment the four aspects of HCD that Norman lays out; I will expand on them here:
- People’s needs should be met. To do this we must understand what their needs are properly.
- People should successfully accomplish the desired tasks with the product (functionality). To do this we need to identify what tasks are actually needed, and then test the prototypes to ensure the product does this.
- People should be able to understand and use the product (usability). Again, to do this we need to test prototypes at every stage with real people.
- The experience should be positive and enjoyable. This one is often ignored or underestimated, but it is this aspect of the user experience that will keep people engaged and coming back for more. It’s the one aspect that makes people love your product. (Think of your favourite things and how much you enjoy using them.) Making something enjoyable to use is a subtle business, but for the purposes of our Hackathon let’s say it helps to approach things with a sense of playfulness.
The design thinking cycle
Norman (2013, pp.226-230) lays out an iterative cycle that we can follow, that is, a process we can repeat over and over to refine a product. The stages are as follows:
- Observation: research on the user to understand the nature of the problem;
- Idea generation (ideation): generate potential solutions;
- Prototyping: mock-up potential solutions;
- Testing: test the potential solutions with people who correspond as closely as possible to the target user group.
This is the general process we will follow in the Hackathon, adjusted to account for the fact that we only have a few days! The version of the cycle I like to use is as follows:
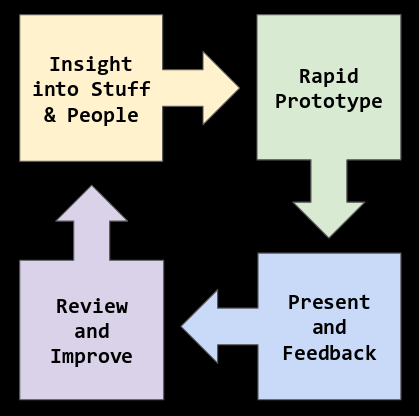
Insight into stuff and people
You will start by gathering information about the manuscripts and our intended users. During the Hackathon you will revisit the insights you have had about the materials and the audience for your web app, deepening and refining your knowledge — whether through repeated trips to the library/web, or through talking with subject experts, or by the results of the user research labs. During this step you are trying to understand fully the nature of the problem, that is, what the user needs.
Rapid prototype
This step includes both idea generation (e.g. by sketching) and prototyping (e.g. paper and web app). You will start by generating many ideas in your group before settling on one web app that you wish to develop. As you design each feature of your web app, you will consider many ideas before choosing what to move forward with. If, in previous steps, you have discovered that your prototype does not function as intended or is not usable in some way, you will generate new solutions to the problem in this step.
Present and feedback
You will have many opportunities to present your prototypes and ideas, and give and receive feedback: during the course of working each day, at the end-of-day roundups, at the user research labs and at the final audience presentation. The hallmark of good feedback in this context is that it includes what works well for the tester, what doesn’t work, and why. The key to accepting feedback effectively is to listen and hear what the other person is saying without rushing to respond. Presenting your prototype can be as simple as showing someone a sketch, giving a talk to walk-through the features, or a more formal user research lab, when you will have a chance to test your prototypes with real people. At last year’s Hackathon, participants reported that the user research labs was one of the most exciting and valuable parts of the week.
Review and improve
In this step you will take the time to review feedback you have received and use to improve your web app. The attention you pay to the feedback you receive will determine how successful your web app will be in meeting the needs of your users. It can be hard to hear critical voices about cherished ideas, but try and keep a dispassionate focus on your intended audience rather than yourself. Reviewing may happen very quickly, for example, during the course of a casual conversation, or it might be more of a team meeting to go over notes from the user research lab. As you review, think about what new insights into user needs you have gained.
User-centered design
At the start of the Hackathon we will present you with a range of user personas. A user persona is an archetype or character that represents a potential user of your web app. As well as a manuscript your team will pick a user persona and design your web app with them in mind. I will not reveal who the user personas are now — it’s a surprise! But here are what user personas are like:
Karen the Senior Manager
Karen is 53 years old with a PhD in economics and she works for a major financial thinktank in a senior leadership role. She is married with three school-age children. She spends her time requesting and reviewing research reports, preparing memos and briefs for clients, and supervising her team of data analysts and economists. She is a confident computer user, particularly with spreadsheets, and spends 3 hours a day on the web. With so many responsibilities, scheduling Karen’s work and home life is of particular concern to her.
Further reading (optional):
Personas: https://www.usability.gov/how-to-and-tools/methods/personas.html
After your team has picked a user persona, you will be asked to write a user story that encapsulates the needs of your user as you understand them. It is necessarily narrow and will focus your team on meeting the user needs and avoid being distracted by spurious ideas or going off at a tangent. This is particularly important in the context of a time-limited hackathon! Whenever you are planning or refining a feature in your web app you can ask yourselves ‘does this meet the needs of our user’s story?’ If not, you should remove or modify it!
User stories are written in the general form:
As a <role>, I want <outcome>, because <reason>.
For example:
As a Senior Manager, I want to schedule my team’s vacations, so that there is a minimum number of staff available at all times.
In the context of our Hackathon, a user story might look like this:
As an Undergraduate Student in Medieval Literature, I want to understand the relative ages of manuscript glosses, because I have to write an essay about it.
The ‘reason’ part of a user story is particularly important since that represents the goal the user is trying to achieve and gives an invaluable insight into their motivation. When you think of how to meet the needs of this user you should also think about how this task fits in with their overall activity and motivation.
In Karen’s example above we could also add:
…so that I can take a holiday myself at a time that coincides with the school holidays…
In Undergraduate example above we could add:
…and get a good mark, so that I can get a First in my degree, because I want to pursue my dream career in academia…
Always bear in mind the motivations of your user — could their needs be met in a different, less obvious way?
Consider also their capabilities. The second example here is of an undergraduate student who does not necessarily have any pre-existing knowledge of glosses. What is a gloss, even? They may not know. They may be able to read some medieval Latin, but maybe not. How would you present information about the chronology of the glosses to a person who cannot read the words?
Even though you were an undergraduate perhaps only two years ago you have probably forgotten already what it means to be so innocent of the basics of your own discipline! By the time you have finished thoroughly researching your chosen manuscript in the Hackathon you will find it even harder to put yourself in your users’ shoes. So this brings us back to where we started at the beginning of this module: it is easy to make assumptions about what your audience knows and what they need. To remedy this you should examine your implicit knowledge, ask questions about what your user knows and what they need, and, of course, listen when they tell you.
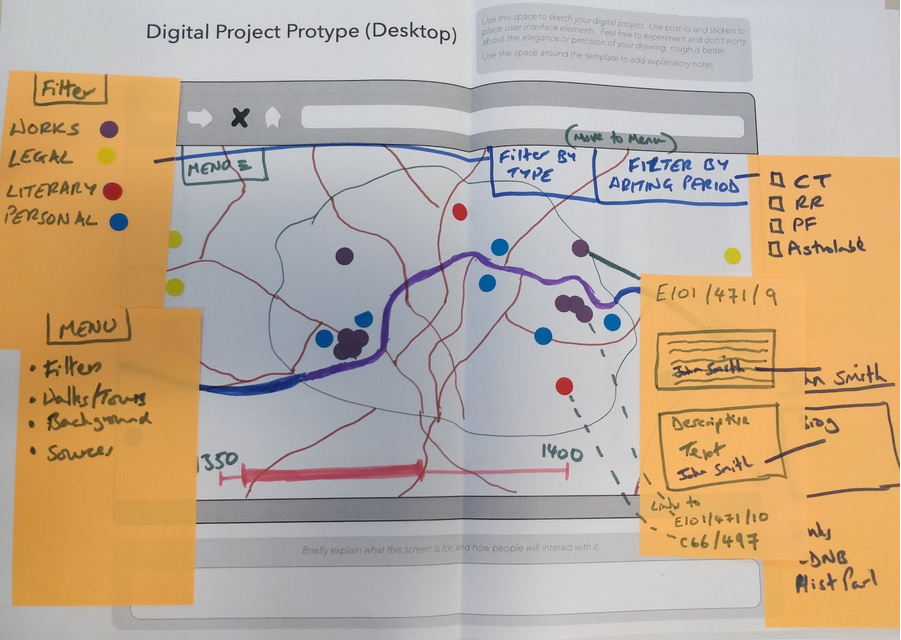
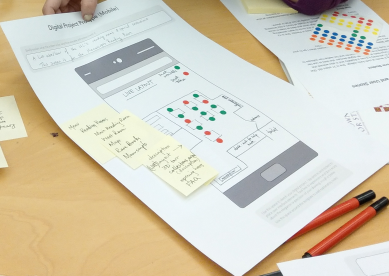
Exercise 2: Using paper to create a low-fidelity prototype
In this exercise you will practice making a paper prototype, perhaps something like this example:
Or perhaps like this:
There is no ‘right’ way to do this exercise and there is no ‘ideal’ answer. It is an exercise in thinking about your user, about ideation and communication.
Gather together some supplies, such as thick pens, Post-It notes, stickers and paper. No pencils — these encourage you to focus on details and offer the temptation to constantly revise work by rubbing it out! If you need to represent a person, use a star person or stick person.

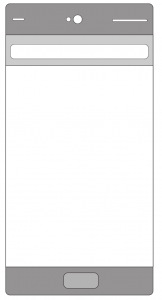
Print out a copy of this wireframe of a mobile phone onto A3-size paper.
Brief:
Create a prototype of a mobile phone app and share it with everyone.
User persona:
Tonya the Sixth-Form Student
Tonya is studying A-levels at sixth-form college. She is 17 years old. She wants to apply to university but has a disability and is also worried she won’t fit in. Tonya feels at ease with digital devices: she likes to use her phone for staying in touch with her friends and her laptop has software to help her study more effectively.
User story:
As a sixth form student, I want to know what to expect when I go to the library, so that I feel encouraged to apply to university.
The use persona and user story are deliberately left open to interpretation. Use your imagination to fill in the gaps and make whatever decisions you like, but make your assumptions explicit.
You might imagine your app has several screens in a series, but we only expect you to show one screen of the app (unless you are feeling very enthusiastic and want to do more!). You could use stickers, sticky notes or drawings to represent buttons, menus or other interactive features. Think about how you will indicate animation or change. Remember that the artistic quality of your drawing does not matter!
Start with notes and sketches of your ideas on separate paper and then move onto completing the prototype. Give yourself a maximum of one hour in total, and after that take your prototype and explain it to someone you know. Ask them for one piece of feedback that would help improve it.
This is the end of Module 3 and the pre-hackathon training programme. Congratulations! See you at the Hands:On Hackathon very soon.